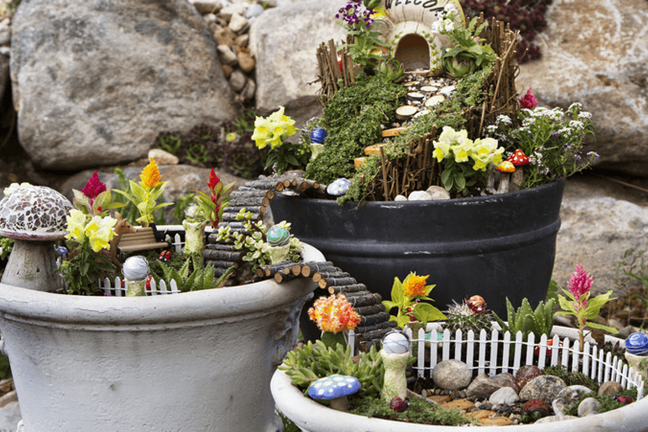
Gardens and magic go hand in hand. Every time you plant a seed, magic seems to happen. While we've never seen them, we're pretty sure that fairies are somehow involved in this!
You can imagine that after a long day of weaving their magic through the garden, they'd love to just chill out and relax like we do. Perhaps, a cosy place to rest their wings and play among the flowers? So why not create a home where they can do just that. All you need is a couple of essential fairy items and few teaspoons of imagination and the fairies will be flocking to their new home in no time!

Pot choice
To start your garden, choose a nice shallow tub container that has good drainage and is easy for little hands to navigate around.
Plant selection
Think about where the garden will be located. Fairies love sheltered spots so a shady position is always best. However a fairy garden can still go in a full sun or partly shaded spot if you grow the right plants. Check plant tags for the spot that they prefer. Once you know where your garden will live, then it is all about picking the plants for fairies to frolic around. Here's a short list of plants that will perform well in different positions in your garden:
Full shade
- Corsican mint
- Rabbit's foot fern
- Baby's tears
- Fuchsia
- Fittonia
- Native viola
- Parlour palms
- Club moss
Part shade
- Violas
- Pansies
- Creeping thyme
- Mondo grass
- Chamomile
- Lobelia
Full sun
- Snapdragon
- Cineraria 'Silver Dust'
- Lamb's ears
- Chamomile
- Creeping thyme
- Brass buttons
- Blue fescue
- Alyssum
Design
Now for the fun part! Think about how you want to lay out your fairy garden. Make sure you give them a place that is warm and cosy to rest their wings – a small terracotta pot placed on its side makes a great fairy house. Also, give the fairies a place to let their hair down, like a small pool or pond. Luckily, Mica® Decorations by Northcote Pottery have just the right tools to give your fairies the relaxed atmosphere that they need. Create a small little pond using the Mica® Decorations Mirror Sand and the Grey Marbles as a border, and just like magic the fairies have a place to cool down after a long summer's day!
Decorate
Not only do fairies need a place to relax, but they also need tools to help look after our gardens (and their new space, too). Check out the Mica® Decorations Mini Starter Pack, which has all the garden tools they'll need.
You will need:
- Garden gloves
- Flexi tub or shallow pot
- Drill (for drainage holes)
- Yates Potting Mix with Dynamic Lifter
- Plants (we used snapdragon, Cineraria 'Silver Dust', blue fescue, brass buttons, creeping thyme, alyssum)
- Yates Thrive Naturals Roses and Flowers
- Mica® Mini Starter Pack
- Mica® Grey Marbles
- Mica® Mirror Sand
- Mica® Flat Stones in White
- Mica® Miniature Archway
- Washed pebbles (for the pathway)
- Northcote Pottery Terracotta Pot 13cm
- Selleys Aquadhere Exterior
- Paddle Pop Sticks
- Sticks and twigs from the garden
- Waterproof fairy lights
Step 1: Drill 4 evenly spaced holes into the base of the tub.
Step 2: Turn over and fill tub with a good quality potting mix such as Yates® Potting Mix with Dynamic Lifter®.
Step 3: Position plants (still in their pots) around the tub to get a feel for where you would like the plants to sit. Create layers, so tall plants are at the back and ground covers near the front. We planted snapdragons at the back, together with Cineraria 'Silver Dust' and blue fescue to add texture to the area. Ensure you leave enough space between plantings to place decorations.
Step 4: To plant, create a hole large enough for the root ball. Gently remove plant from pot, tease the roots and position in the prepared hole. Backfill with potting mix.
Step 5: Where you have chosen to place your fairy house or terracotta pot, flatten out the soil so it will sit level in the garden amongst the larger plants. Position pot and slightly bury the front of the pot in the soil to just cover the entrance.
Step 6: Plant out the front edges of the tub with groundcovers. We used a mix of creeping thyme and alyssum.
Step 7: Create rows or furrows in the soil for paths – consider little pathways leading to the entrance of the fairy house or base of garden beds. Also create a small hole for the pond.
Step 8: Carefully line furrows with pebbles to create paths.
Step 9: Line the pond with Mica Grey Pebbles, then fill with Mica Mirror Sand to give the illusion of water. You can also add a couple of pebbles in the centre of the pond to help fairies can hop from one side to the other.
Step 10: Decorate the gardens with Mica Decorations and Stones. For an added touch, create a small clothes line with to sticks connected together with twine and a couple of tiny pegs.
Step 11: Water all plants in well with Thrive Naturals Roses and Flowers Liquid Plant Food.
Step 12: To create a base for inside of the terracotta pot (we don't want fairies to get cold!), glue twigs and sticks onto paddle pop sticks with Selleys Aquadhere Exterior Glue. Hold the sticks together with pegs and leave overnight to set.
Step 13: Once set, position inside the pot and decorate with pom poms. Finish by adding in waterproof fairy lights to create a warm glow.
Watch this video on How to Build a Fairy Garden for inspiration...


